Showing posts with label braids. Show all posts

Wednesday, October 17, 2012

Ribbon Braids Over the Top (Ribbon PT Style #4)

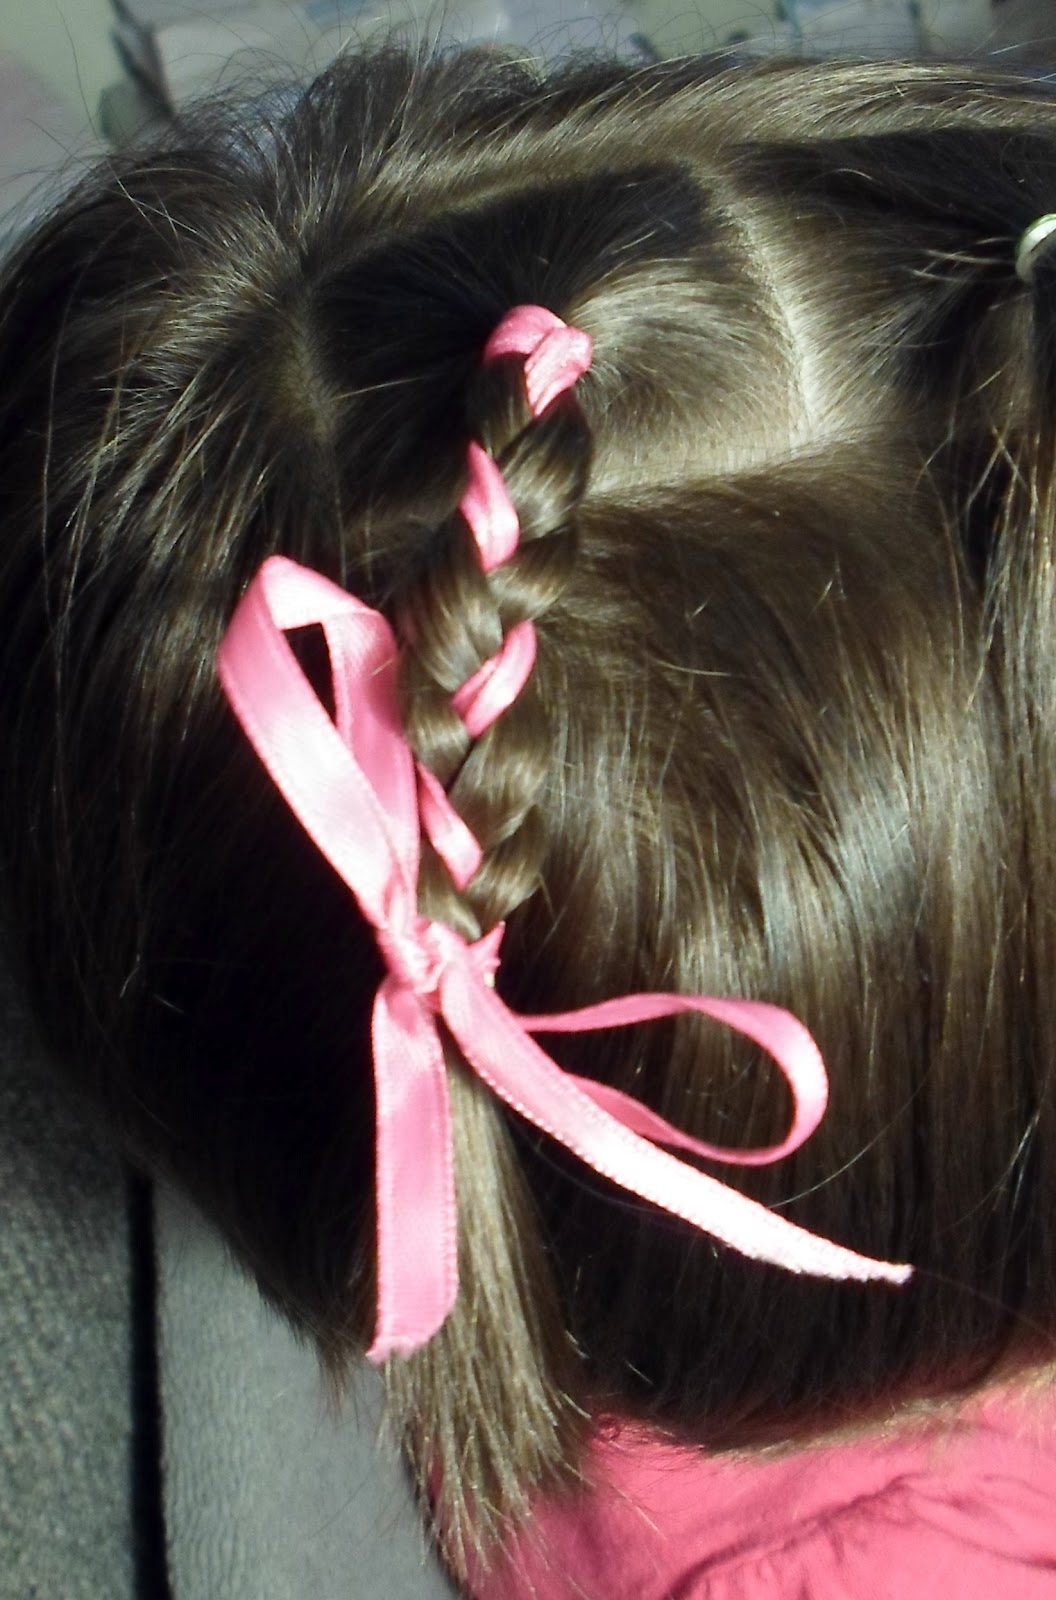
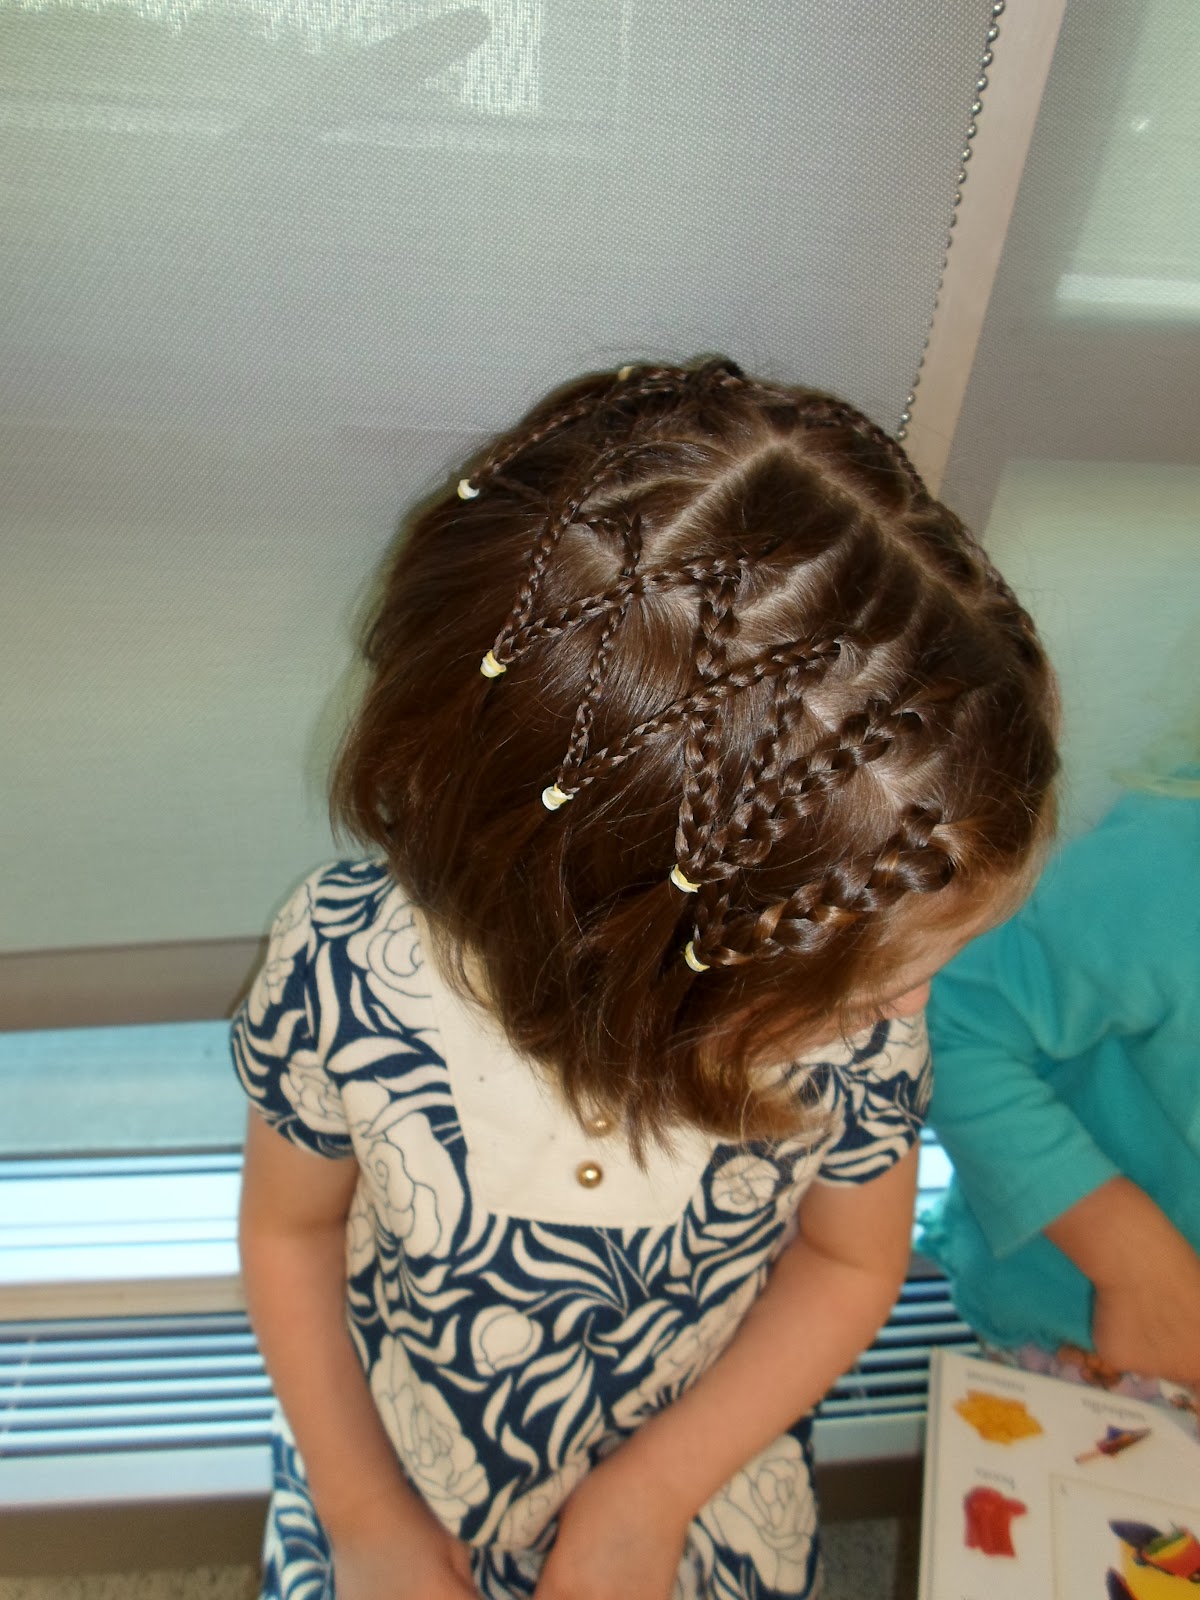
Ribbon braids and ribbon pull-throughs working together... This is a fun style, and you can change the ribbon colors as you want to match an outfit or celebrate a holiday. 

To begin, part out 6 sections on top of her head, with 3 smaller and 3 bigger, as in the picture below.  Tie off the smaller 3 with elastics, and the bigger 3 with hair bands that you'll remove (and likely with only one hand, so make them easy to take out!).  Do comb/smooth out the larger sections now, though, since it'll be hard to do later: 
 Here's a close-up of the smaller three: 
Do a ribbon pull-through with each smaller section, pulling the hair & ribbons up through the section, towards the other side of her head.  It should look like this now: 
Now do a ribbon braid with each section, using the hair as one strand and each of the two ribbon halves as the other two strands.  Remove the temporary hair band from the larger section and secure the ribbon braid to that section with an elastic.  Wrap the ends of the ribbon to hide the elastic and tie a bow.  Trim the ends of the ribbons to be even-ish with her hair.  You can then leave as is or do another pull-through with that bottom elastic in each section. 
Here it is without the last sections being pulled-through (she's squinting in the sunlight, below).  I lost my pic of the style with those sections pulled through, but it's cute that way, too!  You get the idea...

Saturday, September 29, 2012

Mini-Buns with Dutch Braid Accent

We took this style to dance class today (can you tell??).  Two tiny buns with a braid going into one. 

As (almost) always :) , start with a large box part on top of her head.  Then part out an arc at the front of her head: 
Do a Dutch braid (inside-out French braid), starting on the left (or whichever side you prefer), and braiding out as far as you can after using up the hair in the arc.  Secure with a temporary hair band. 
Then you're going to split the remaining hair into two little ponies.  I collected more hair in the one on the left, since the one on the right was going to have the hair from the braid combined into it, too.  To make this look less unbalanced, I used a diagonal part. 
Then turn the two little ponies into two little buns... Use whatever method you prefer (classic, messy, etc.).  I did classic buns, but they ended up looking pretty "messy" since her hair is so short.  I used about 4 bobby pins for each, and tried to have them overlap when possible for extra security.  Here's a close-up of the first mini-bun...
And the finished product, with cute bows to match her dance outfit...


Tuesday, September 25, 2012

Dutch Braid Pull-Backs

Simple.  Sweet.  This is just 3 Dutch braids (aka "inside-out" French braids) going straight back into two pull-backs.  Two of the 3 braids are pulled together for one of the pull-backs to give a little more visual interest.  You probably don't need more than this, but if you do, here are brief instructions...

Start with a large box part on top of the head (seriously, with her short hair, I feel like 90% of my styles start this way these days!).  Then part that into two sections, with one slightly larger than the other.  Dutch-braid the smaller one:
Then divide the remaining section into two, Dutch-braid each of those sections, and join them with one elastic.  Try to get the pull-backs even, and similar in their spoutiness:
Add bows and hit the park!  (or school, errands, etc.)


Tuesday, September 18, 2012

Three Little Ribbon Braids


The ribbon braid... a sweet accent to any girl's head of hair.  Simple to do, too!  Read on for instructions...

I chose to do three small ribbon braids on the top/side of Little Miss' head.  To do this, begin with a side part (though not a deep one), and part out three little squares.  Tie these off with elastics, making sure to angle the hair down towards the floor each time.  (If the elastics are angled such that the hair points up, these little braids will be more palm-tree-like, which I think looks funny for this style.)


Next, cut three pieces of ribbon (I used 1/4" wide polyester), each to about four times the length of the piece of hair you'll be ribbon braiding with it.  Remember, if it's too long, you can always trim it later.  Better too long than too short!  I like to cut the ends at an angle to look a little more finished. 

Using your fingers, open up the part of the elastic on top of one of the little ponies you made, and slide one of the ribbons in to its halfway point.  (This pic shows the ribbon sliding in, but it's not to its halfway point yet.)


Once the ribbon is in place, wrap the two halves around the elastic in opposite directions, to cover it up.  Then tie them together on one side.  Like so: 


Now you're ready to ribbon-braid.  Divide the hair into two sections, and use the two pieces of ribbon together as the third section.  Braid down however far you'd like, then secure the whole thing with another elastic.  Do the same wrapping around that elastic with the ribbon that you did with the top one, then tie a pretty bow. 


For a little different look, separate the two strands of ribbon and use them individually, with the whole amount of hair being the third strand in the braid.  Also pretty, and a little more unique:


And with all three braids, we have this...


Have a great day!

Sunday, September 9, 2012

Joined Braids Around the Head


I love the way this style turned out!  It took a bit longer than I'd thought it would... somehow we still made it to church on time, which is a miracle in our house!  ;)  The style is very simple in theory; the time involved just depends on how many braids you do and how fast a braider you are.

Start with a part just off center (or in the center if you'd prefer), as shown:


Then create little box parts all around the main part; along each side and in the back.  Tie them off with temporary hair bands.  


Start with the front section on one side; I chose her right side.  Braid it, holding the braid back towards the back of the head as you braid so that it will lie flat when tied to its partner.  With this style, always braid down as far as you can if your dd has short hair like mine!  Otherwise, braid it down however long you'd like.  Do the same to the second section.  With the third section, you'll do something different.  Divide it into two and cross the two sections, as shown in the picture below. 


Clip the now-lefthand section somewhere out of the way.  Braid the righthand one, angling it towards the front of the head, and join it to the first braid with an elastic.  (Crossing the sections before braiding gives them the more seamless appearance that the two braids are coming from one section and not two.)   Here I'm holding the second braid out of the way so you can see the first and part of the third sections braided and joined. 


Keep this up for all of the sections around the head, dividing them in two, crossing them over, braiding, and joining with previous braids, until you get to the last two sections.  Like with the first two sections, don't divide them; just braid the entire section, joining it to a previous braid.  With each joined pair, try to keep it consistent which braid is on top and which on the bottom.  I always had the righthand braid on top and the lefthand on the bottom.  When you're done, give yourself a pat on the back (you've earned it!) and go back and cut the elastics you're not using anymore... See the one I mean in the pic below?


I then smoothed everything out and gave her head a couple of squirts of hairspray to tame/prevent flyaways.  And here's the finished product...


Happy hair-doing!  :)

Wednesday, August 29, 2012

Braided Headband for Very Short Hair

My fingers have been aching to braid again!  I love doing all kinds of styles on my daughter's hair, but braiding and latticing/weaving are probably my favorites.  Thus was today's style born.  This is a version of princesshairstyles.com's "Barbie Hairstyle," which I've adapted for super short hair.  That being said, Little Miss' hair is a little too short even for this adaptation.  It's a little challenging to hold the braid with such short strands.  But we made it work.  Read on for instructions...

Since Little Miss' hair is in no way long enough for a complete headband, I only did the "headband" on the longer side.  So I started with her default side part, and then parted out the section of hair to be braided.  I decided to use a wavy part, although I did not make the braid itself curve back-and-forth with the part.  Honestly, that may have looked cuter, but I completely forgot!  Maybe I'll try that when her hair's a little longer.  :)  To make the wavy part, I first parted off the front ("bangs") section and secured it out of the way with a hair band temporarily.


Next, I made a wavy part parallel to the first, about an inch behind it.  I secured the hair after this second part with a few unadorned alligator clips, leaving the hair in between the two parts loose to be braided.

(Again, her hair is not greasy in these pics; it's the water I use to smooth her hair while styling it.)  Next, I did an inside-out French braid along the strip of isolated hair, cornrow-like.  I had to secure it a bit sooner than I would've liked, since the hairs got so short! 


Finally, I removed the hair band from the front section, smoothed it back with water and a comb, gave it a quick twist, and joined it to the braid with an elastic.

Add a bow, and you're done!