

I chose to do three small ribbon braids on the top/side of Little Miss' head. To do this, begin with a side part (though not a deep one), and part out three little squares. Tie these off with elastics, making sure to angle the hair down towards the floor each time. (If the elastics are angled such that the hair points up, these little braids will be more palm-tree-like, which I think looks funny for this style.)

Next, cut three pieces of ribbon (I used 1/4" wide polyester), each to about four times the length of the piece of hair you'll be ribbon braiding with it. Remember, if it's too long, you can always trim it later. Better too long than too short! I like to cut the ends at an angle to look a little more finished.
Using your fingers, open up the part of the elastic on top of one of the little ponies you made, and slide one of the ribbons in to its halfway point. (This pic shows the ribbon sliding in, but it's not to its halfway point yet.)

Once the ribbon is in place, wrap the two halves around the elastic in opposite directions, to cover it up. Then tie them together on one side. Like so:

Now you're ready to ribbon-braid. Divide the hair into two sections, and use the two pieces of ribbon together as the third section. Braid down however far you'd like, then secure the whole thing with another elastic. Do the same wrapping around that elastic with the ribbon that you did with the top one, then tie a pretty bow.
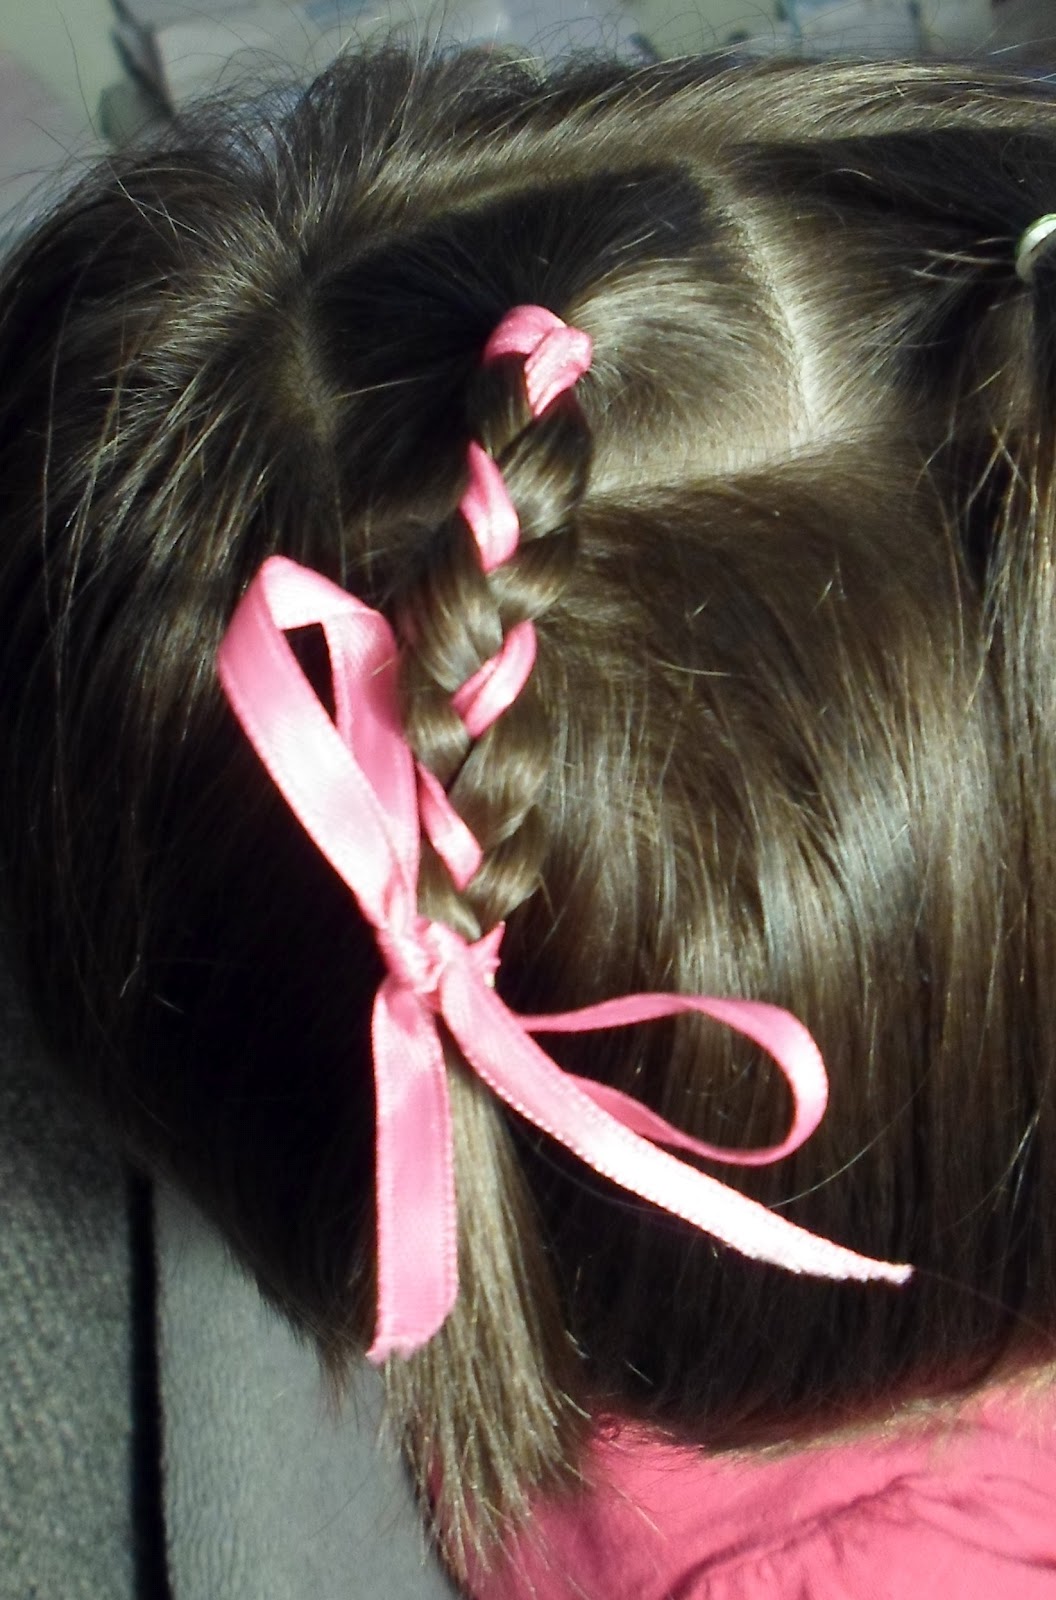
For a little different look, separate the two strands of ribbon and use them individually, with the whole amount of hair being the third strand in the braid. Also pretty, and a little more unique:

And with all three braids, we have this...

Have a great day!
No comments:
Post a Comment
We love comments!