

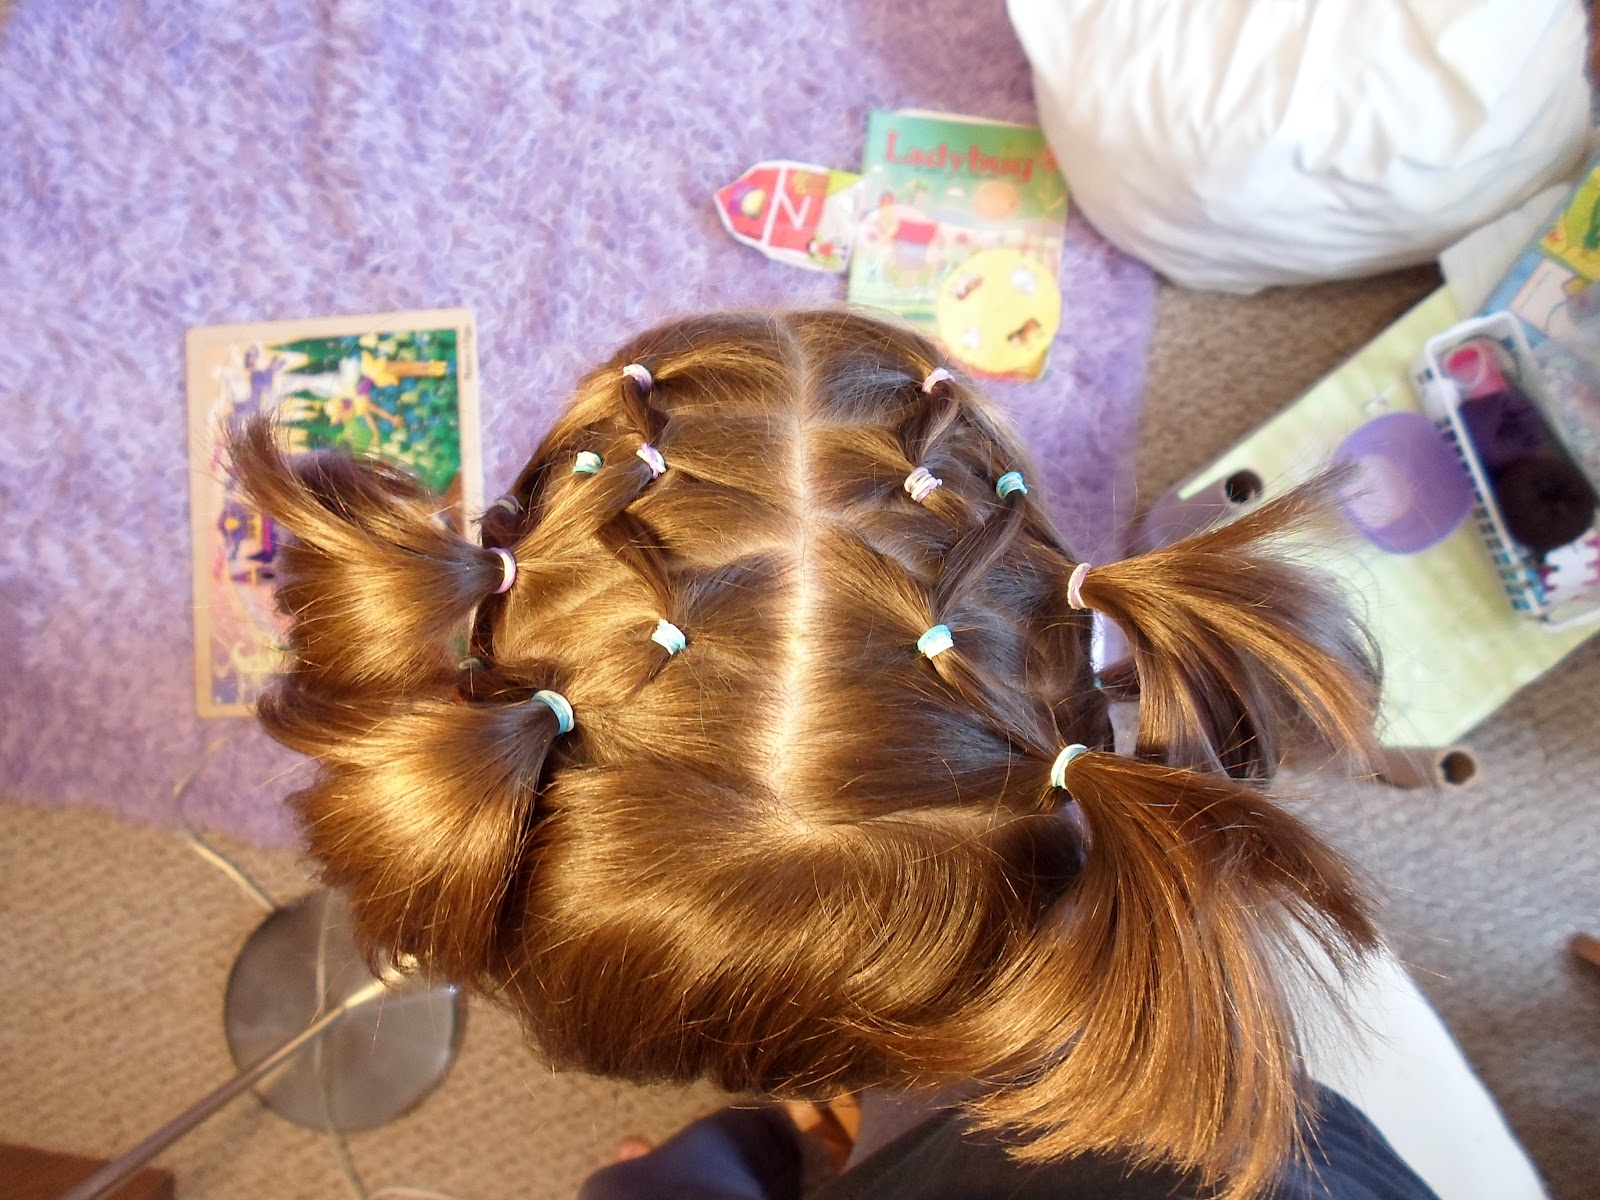
Our first sides-up style since her haircut! I am giddy. She got a lot of compliments on this one, and it lasted three days to boot! (Probably could've done longer, but I wanted to wash her hair.) For a quick overview of what you're looking at, this is four pull-backs (two on each side) with some latticework thrown in. If you can see it in the picture, there is a one diamond of purple elastics and one of turquoise on each side. The purple elastics lead to the front pull-back on each side, and the turquoise to the one in back. The two diamonds overlap, since the front turquoise elastic is just in front of the purple pull-back. See it? A bit of an argyle pattern.
To recreate this style, start with a part down the center of your style-wearer's head. On each side, you're going to make four rows. The front row will simply be gathered into a purple elastic. (Or whatever color you want... I'm going to refer to them by the colors I used so you can follow along.) The back row on each side will also only be one elastic, but don't do that yet! The two middle rows will each be divided into three sections. That's the general plan. Here we go step by step...


Remove the temporary hair band, and divide the third row into three triangles, just like the second row. Clip the hair for the middle triangle out of the way. Then unclip the turquoise elastic from row 2. Divide it in two, combining half with the triangle on the right, and half with the triangle on the left, both with turquoise elastics. Then unclip the middle section. Combining the two purples from row 2 with the middle triangle of row 3 with another purple elastic. Tie this one off close to the scalp, so that it's nice and spout-y.


Here's the finished product... I don't usually bribe for sitting for hairstyles, but this one took a while, especially as I was figuring it out, so Little Miss got a cinnamon roll for her trouble. She did like the end result, though. We thought she looked like a little pixie, with the springiness of the four pull-backs; hence the name of the style!


Wow! You are so clever and creative! Love all your hairstyles!
ReplyDelete